One of the reasons purchasing a used coordinate measuring machine is a smart move is that the mechanical structures of these instruments tend not to change much over the years, and you can purchase equipment made decades ago that operates the same as one today. There have been several changes over the years, such as a move away from granite tables to allow for more out-of-lab inspections, but by and large you can confidently buy vintage instruments and upgrade or retrofit them later. While the core mechanics of a coordinate measuring machine have changed very little, metrology as a field has still been pushing boundaries in other ways, and there are plenty of improvements you can make to your inspection capacity.
Software is one of the key areas where improvements have been made in metrology to help manufacturers overcome bottlenecks, interrupt parts programs for rush orders, and rapidly collect data. Using an outdated software package can lead to regular frustrations and headaches, many of which can be solved by an upgrade that irons out these pain points. DataPage+ SPC, for example, was designed to collect in one spot data from all of the machines in your shop, including laser trackers, vision systems, calipers, gages, and coordinate measuring machines. PC-DMIS, the world’s leading inspection software, now offers CAD modelling and offline programming, a feature that allows you to program inspection while the instrument keeps measuring.

If your software is outdated and continually results in long downtimes, bottlenecks, and frustrations, turn to an independent metrology dealer who can offer advice and training on the package. PC-DMIS e-learning courses are available from Canadian Measurement Metrology Inc. (CMM), a training solution that can spare you the expense and downtime of sending your metrologists out of the shop for days.
In addition to software, new technologies can improve the functionality of an older piece of equipment, including laser scanners and visions systems that change the kinds of components and materials you can efficiently measure. Malleable components that are affected by touch need to be inspected using a vision system, which captures an image of the component and then measures the image. Upgrades like vision systems and laser scanners are all popular options for retrofits from metrology dealers like CMM and quickly improve the productivity of your QA department. Laser scanners are often mounted onto portable arms or bridge-style machines and can rapidly collect data from large or components.
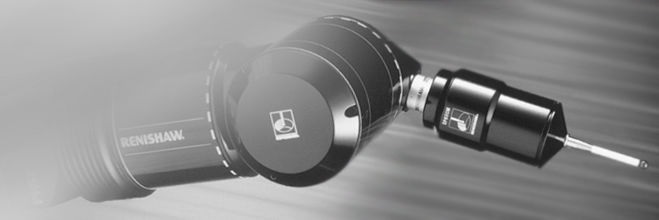
Finally, there’s 5-axis head technology that allows you to truly improve CMM accuracy with rapid touch-trigger measurements; rather than the entire coordinate measuring machine structure moving, only the head moves, reducing errors and improving speed. Without 5-axis head technology, the only way to increase the speed of the routine is to increase the speed of the coordinate measuring machine’s 3 axes. Upgrades like the Renishaw PH20 scanning probe also make calibration faster, as it can determine probe positioning and head orientation all at once, in one operation. When you purchase a used coordinate measuring machine, any of the above upgrades can help you improve your inspection speed and the accuracy of your results. Ask a reputable metrology dealer about upgrades and retrofits today.